Bash scripting 24 – firewalls
I am still experimenting with gopher, however this got me thinking about system security, so I have installed.
If you are not sure what you are doing with this, please consult the man page
man ufw
So this describes ufw as
ufw - program for managing a netfilter firewall
As I am ssh'd in to the pi, then the firewall needs to be enabled, however, first make sure that that port 22 (or which ever port you are using for ssh) is allowed. I have to do this as being logged in via ssh, emabling the firewall could block ssh preventing access.
sudo ufw allow 22
Then check the status
sudo ufw status
Status: active

To                         Action      From
--                         ------      ----
22                         ALLOW       Anywhere
22 (v6)                  ALLOW       Anywhere (v6)
To confirm that port 22 is allowed, then enable
sudo ufw enable
Links
Tags
#Bash,#Bashscripting,#BashScripting#Security,#Firewall
AI statement :
Consent is NOT granted to use the content of this blog for the purposes of AI training or similar activity. Consent CANNOT be assumed, it has to be granted.

CyberSecurity part 15
As this series is going to eventually get to looking at cybersecurity, it would be a good idea to learn about networking concepts. This video seems good at explaining some of this. In fact, it also covers firewalls, which I had planned for a later post.
I have also added links to details of common network ports and their associated services.
What is:
- a switch
- router
- gateway
- subnet
- gateway
- firewall
- DMZ
Links
Tags
#CyberSecurity,#Networking,#Ports,#Switch,#Subnet,#IP,'#Gateway,#Firewall,#DMZ,#Router,#Ports
AI statement :
Consent is NOT granted to use the content of this blog for the purposes of AI training or similar activity. Consent CANNOT be assumed, it has to be granted.
Website on pi

I spent some time on last night, setting up a mini web server on m Raspberry pi.
So running a http server on a Raspberry Pi.
For this project I am just using the python3-test-server package,
- Install python3-test-server
- Create a directory to hold some html files
- Change to this directory
- Create a very basic html file e.g index.html
- run python3 -m http.server:7800 where 7800 is the port you want to use
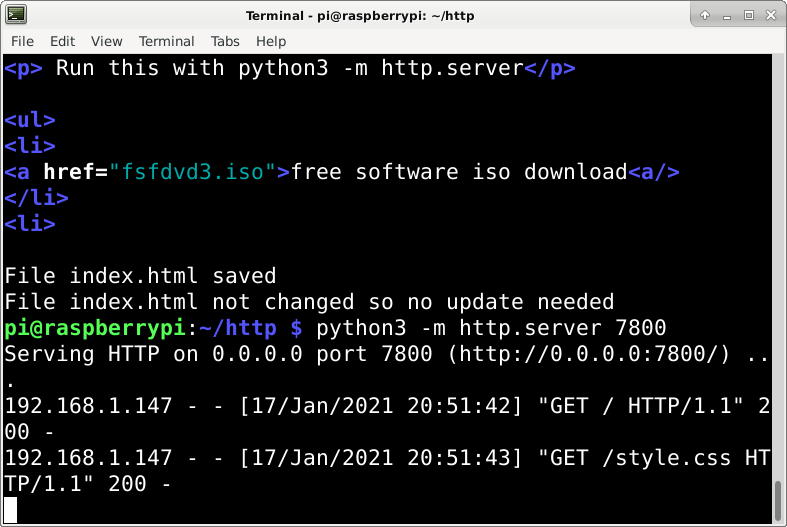
In the browser go to ip:7800
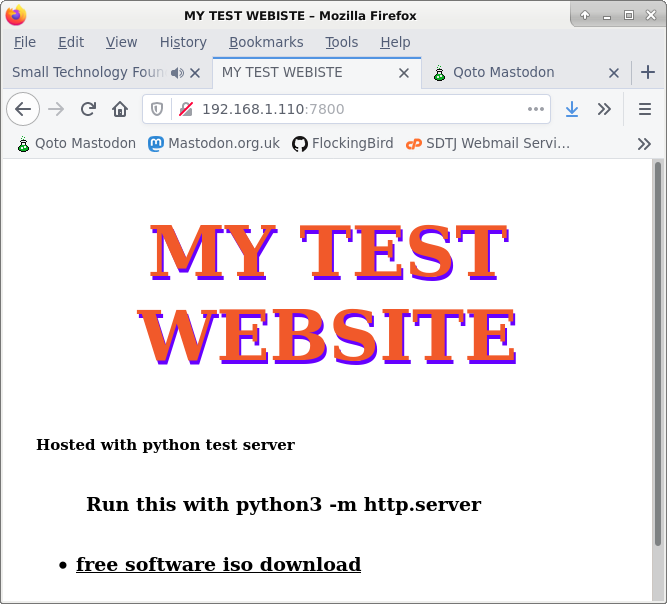
What I have done here, however is
I have, gone a little further than this:
In order to share my free software video dvd (and other resources) with people I:-
- Uploaded files to the server
- Created a web link to the iso file
- Edited my router firewall so it would allow a connection to the pi
I then shared the appropriate IP address with a friend via irc so he could download the ISO file, and it worked really well.
REFERENCES
TAGS
#YearOfTheFediverse,#httpServer,#website,#html,#css,
#Python,#Firewall,#Networking,ProblemSolving,#Skills,#IT

This work is licensed under a Creative Commons Attribution-ShareAlike 4.0 International License
AI statement :
Consent is NOT granted to use the content of this blog for the purposes of AI training or similar activity. Consent CANNOT be assumed, it has to be granted.